
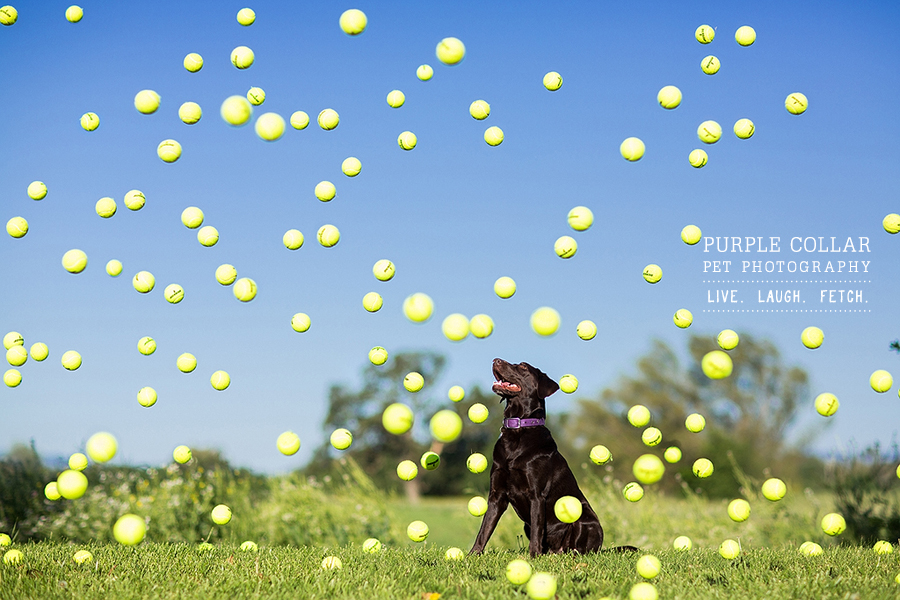
The above shot of my Chocolate Lab, Samantha, is one of my favorite photos. Unfortunately, it isn’t real. At least, not completely real — it’s a composite of about thirty photos blended together, and an example of using software and low-cost workarounds to achieve a creative vision that would otherwise be prohibitively expensive or just plain impossible.
This particular shot started with an idea: what would my sweet Brown Dog do if she were ever caught up in a spontaneous downpour of tennis balls? What would it look like? Now as much as I’d love to say that one day Sam and I were out for a walk and the blue skies just decided to open up and pelt us with thousands of tennis balls, or that I rented a hot air balloon and had someone dump balls by the bucket over the side while I waited for just the right moment, neither of those things would be true (though they would make for great stories)! But by using composite techniques you could make them seem true, and on a shoestring budget.
Using a Tripod and Remote Shutter Release
Here’s what was used for the tennis ball shot:
- One Chocolate Lab 🙂
- Six tennis balls
- A tripod
- A remote shutter release
That’s it! No hot air balloons, no crazy weather. But despite this kind of shot’s simplicity, there are still a few considerations to be made.
First: How much time do you want to invest in the composite process? If you want to make the job easier, you can frame your shot against a static background. This will give you some leeway when masking individual photos and will allow you to avoid painstaking blending on an almost pixel-by-pixel basis. The same is also true for lighting! Shadows that move across your background, or even just the luminance of the sky deepening or lightening as the sun changes position can make your job more difficult.
Second: Frame your shot around your subject and set the desired focus. As soon as you set your focus, you should change your focusing mode to manual and ensure that you keep your focus consistent for the rest of the shot. This will ensure that your focal plane will stay consistent throughout the series of photos that you’re going to blend together, which is key for achieving a realistic look. For example, it would look odd if objects, based on their depth within the shot, were to appear in focus when they should appear blurred because your focus had changed.
After you have your subject framed and your focus set, you can just have fun with it.  For this shot, I was throwing the tennis balls, 4-6 at a time, in the air over and over while using the remote shutter release (I imagine that anyone watching must have been very amused; I’m pretty sure Sam thought I had lost my marbles). I then used Adobe Lightroom to make uniform adjustments to the photos, imported each photo into Photoshop and began the process of blending them together using layer masks.
So in the end, the tennis balls did rain down from the sky — just not all at once. Â 🙂
Stitching Photos that Overlap
Photos for a composite don’t all have to be taken with your camera mounted to a tripod, however. Take, for instance, the below shot of Bullitt the Border Collie. One of the aims of my shoot with Bullitt was to capture both his athleticism and his love for catching his cute watermelon frisbee. As I was looking through the photos from his (super fun) shoot, I saw a string of shots where Bullitt tracked and spectacularly caught his frisbee in mid-air. When I noticed that the focal plane stayed consistent in each shot and that the backgrounds overlapped, I saw the potential for a truly unique photo of Bullitt completely in his element.
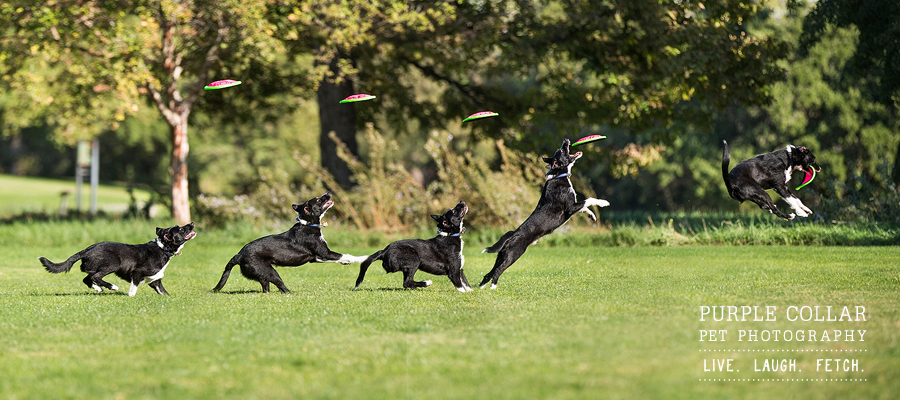
Unlike the tennis ball photo, my camera wasn’t mounted on a tripod. Instead, I was panning horizontally as Bullitt ran through the grass. But just as with the first photo, the focal plane stayed consistent in each photo, and the backgrounds overlapped enough that I could blend the photos together. The final composite pulls material together from five vertical crops.
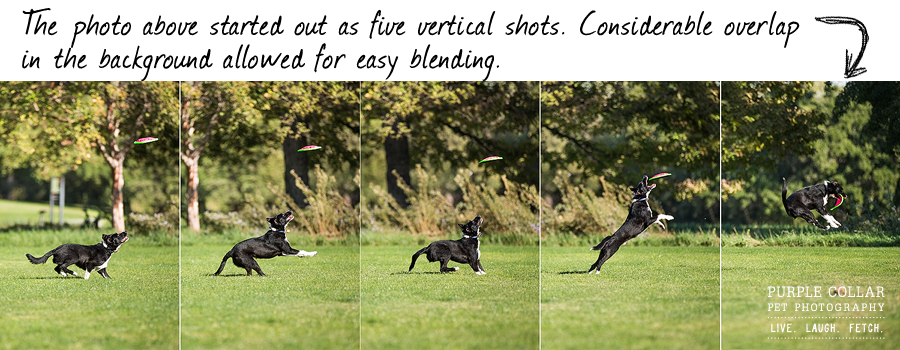
One thing to note with this technique is that lens constraints, like light fall-off or loss of sharpness in edges and corners, can make the seams between the shots more noticeable. Keeping the blended portions in the middle of the frame will help alleviate these imperfections, as will the use of corrective lens profiles in software or the use of careful touch-up.
Using Composite to Extend Dynamic Range
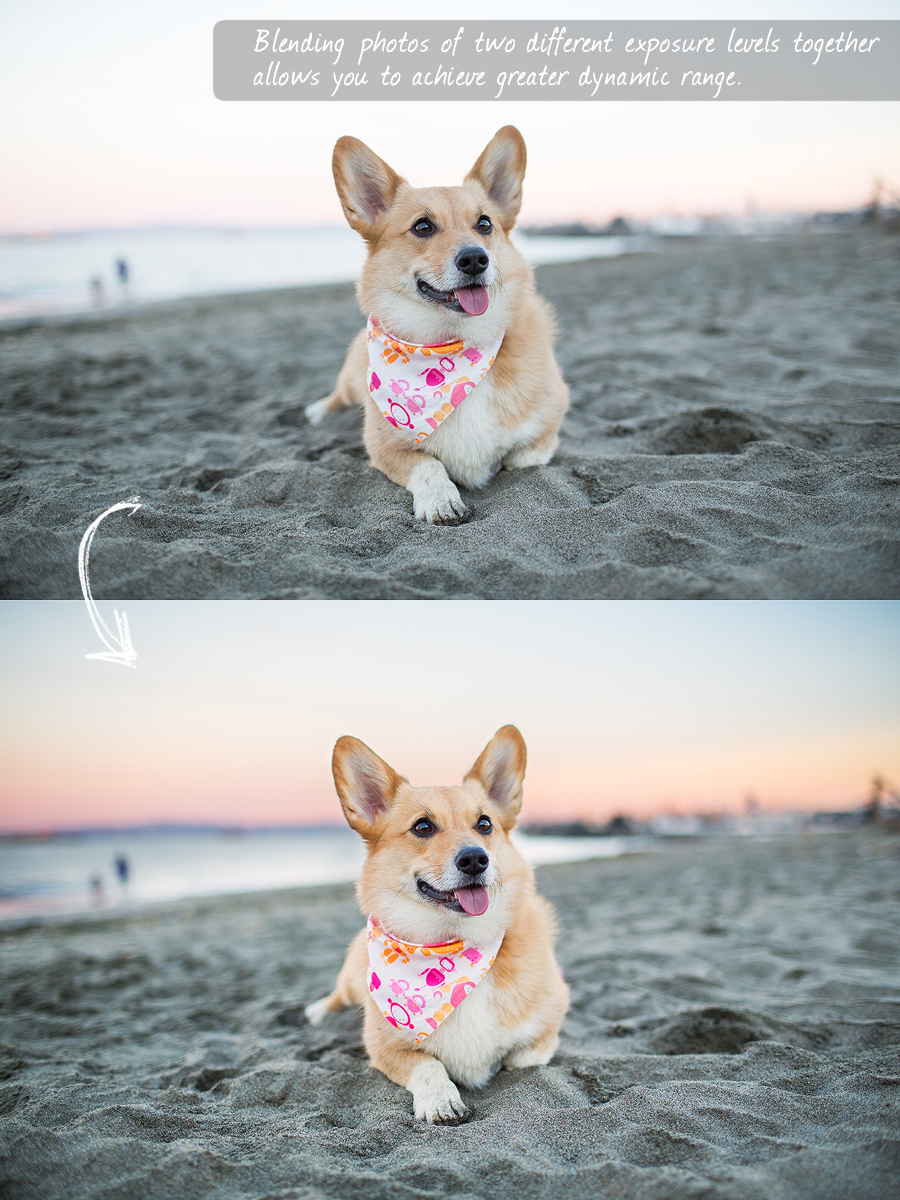
Another method of composite work can involve separate copies of the same shot adjusted to different exposure levels, color temperatures, etc. In this shot of Peaches, for example, the difference in illumination between the foreground and the background was so great that I was forced to choose between exposing for one or the other. So of course I exposed for the cute Corgi! I was then able to take a different copy of the same photo and make some exposure adjustments before blending the two together. The result is a composite photo that, ironically, more accurately depicted what my eyes saw than what any one individual shot would have.
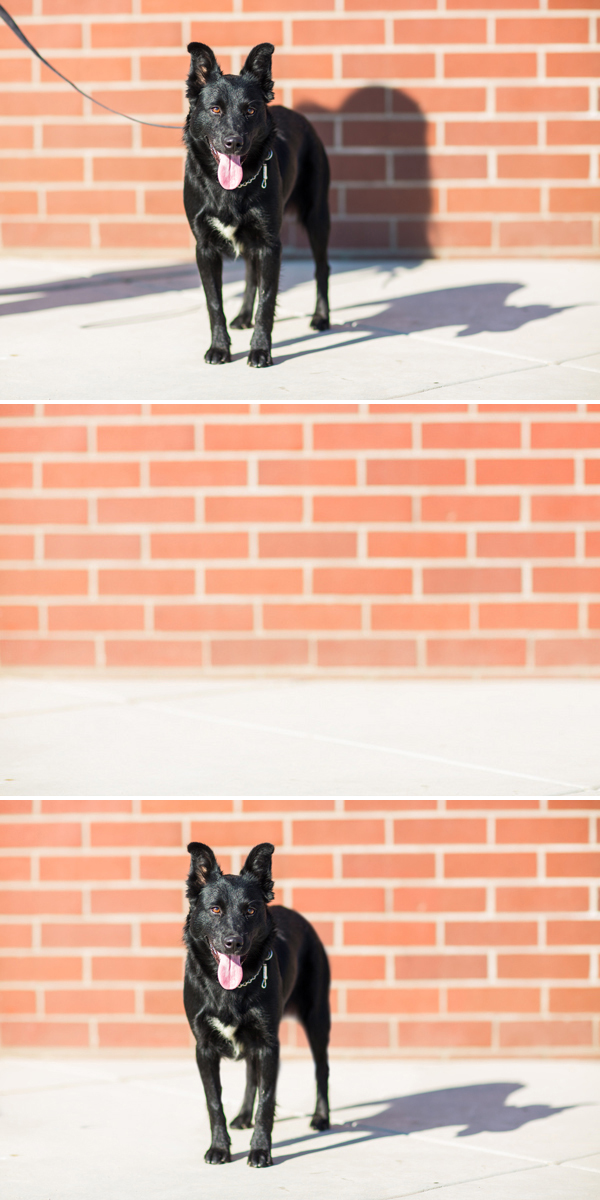
Saving the Day with Leash Removal
Creating a composite for the purposes of leash removal can be an incredible time-saver when compared to another method, such as cloning. For the below shot, I switched my focus to manual after capturing the frame and took a blank frame of just the background. While I did not use a tripod (and tried to remain as still as possible, though I failed!), I recommend one for best results. Afterward it was as simple as matching up and masking in the blank background to remove the leash and shadow.
The ability to work with and assemble composite photographs can be an incredibly useful skill to have at your disposal. Not only does it allow you virtually limitless creative possibilities, it can save also you time in the editing process and help you salvage photos that otherwise might not be up to your usual standard.
As with just about everything in photography, there is certainly more than one way to do the things that assembling a composite allows you to accomplish, and composite may not always be the best tool for the job. After all, many photographers (and rightfully so) will talk about “getting it right” in camera. But if you happen to make a mistake, or if you’d like to add a surreal special effect to a photo without breaking the bank, it’s always nice to have an alternative in post!

2 comments